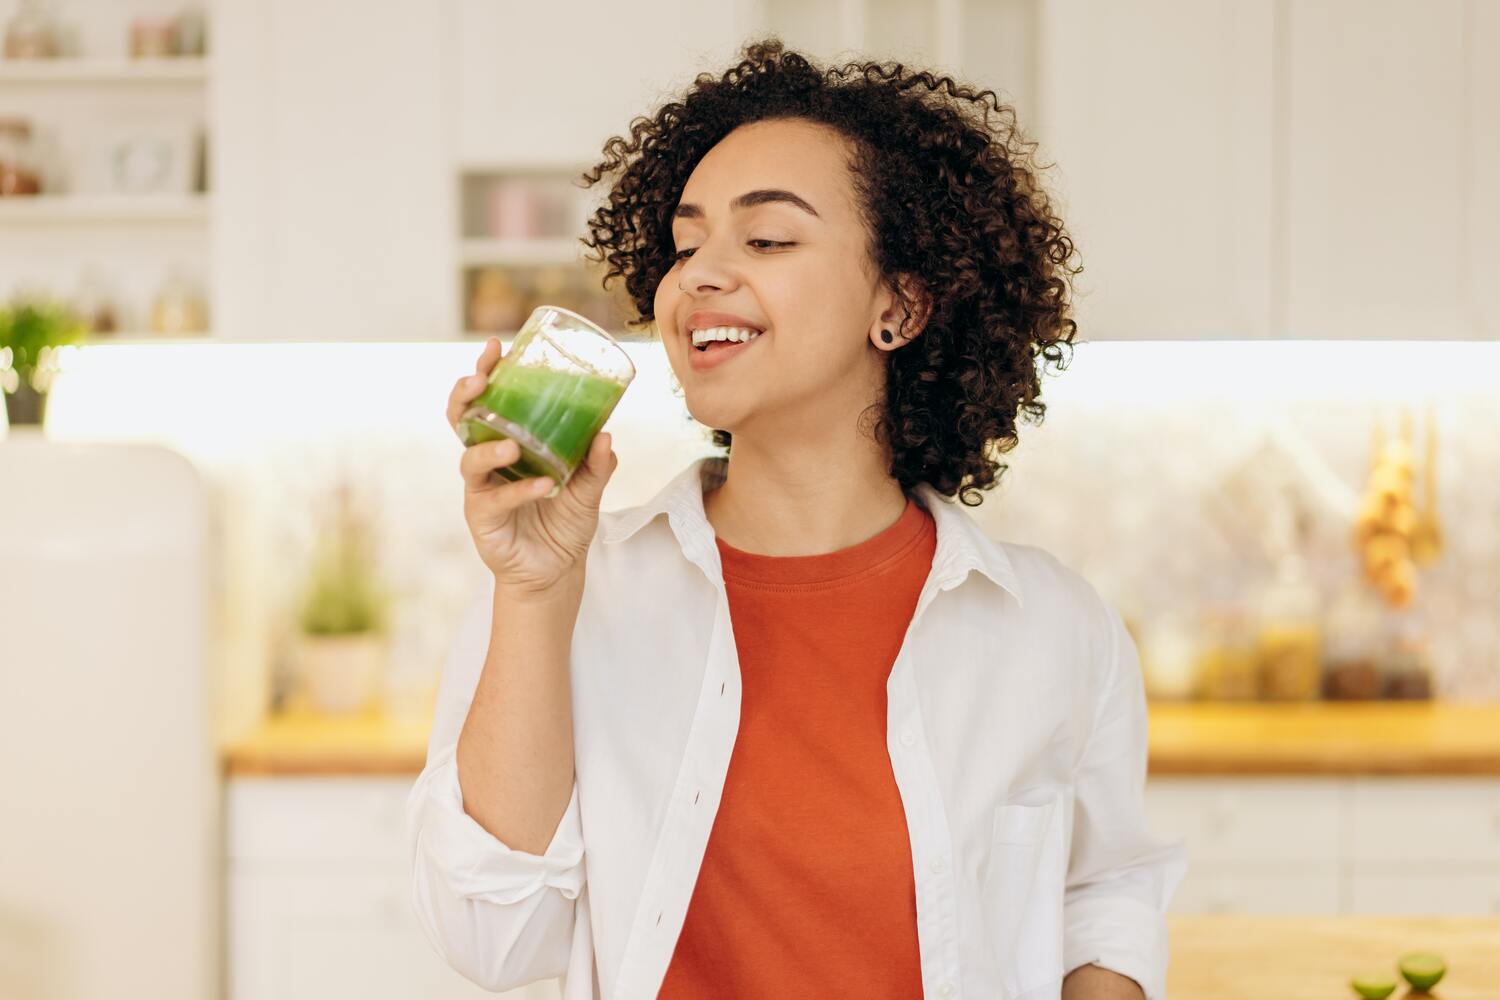

Yes, it is finally Halloween time! But the truth is refined sugar, artificial colors and much more are everywhere this holidays. This equates to our kids consuming much more sugar than normal. This isn't a healthy or fun habit.
While it's difficult to eat healthy on Halloween, it doesn’t have to be that way. Choosing healthier options can be a fun twist. Check out these healthy treats that don’t diminish the Halloween spirit.
Try these cute, spooky, and healthy treats to get kids excited about eating healthy on Halloween.
1- Bat Bites
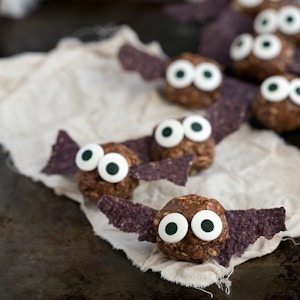
(Nutrition profile: Vegan, Lactose-Free, Gluten-Free)
INGREDIENTS
- 1/3 cup dark chocolate chips, coarsely chopped
- 1 cup creamy peanut butter
- 1/2 cup honey
- 2 tablespoons cocoa powder
- 1 scoop (1/4 cup + 1 tablespoon (32g)) chocolate protein powder
- 1/8 teaspoon fine sea salt
- 1 and 1/2 cups old fashioned oats
- 1 teaspoon vanilla extract
INSTRUCTIONS
- Coarsely chop the chocolate into small pieces and set it aside.
- Combine: In a large bowl, add the coarsely chopped chocolate, 1 cup creamy peanut butter, 1/2 cup honey, 2 tablespoons cocoa powder, 1/8 teaspoon sea salt, 1 scoop chocolate protein powder, 1 and 1/2 cups old fashioned oats, and 1 teaspoon vanilla extract. Using a hand mixer, beat until the mixture is well combined.
- Scoop: Using a cookie scoop or 1 tablespoon measuring spoon, scoop even-sized amounts of dough and roll into balls. Place on a parchment paper-lined plate and freeze for 15 minutes before eating.
2- Frozen Banana Mummies

(Nutrition profile: Vegan, Gluten-Free, Lactose-Free)
INGREDIENTS
- 3 large bananas
- 3 tablespoons gently melted, cocoa butter
- Candy eyes, chocolate chips, currants or raisins
- 3 tablespoons powdered coconut sugar
INSTRUCTIONS
- Peel and slice the bananas into 1-1/2? chunks. Skewer bananas with lollipop sticks, or use kebab skewers. Place on a parchment-lined baking sheet and freeze.
- For the candy coating; in a small bowl, mix the melted cocoa butter with the powdered coconut sugar.
- Spoon a little drop of candy coating on a frozen banana and stick on an eye (or two, or three). Using a spoon, have the kids drizzle candy coating over the bananas in all directions, avoiding the eye.
- An egg carton turned upside down with little holes poked in the bottom made a good stand.
- For the “Things”; add the orange shredded coconut by mixing a few drops of yellow and a drop of red natural colors with some unsweetened shredded coconut.
- To assemble the “Things”: Attach eyes with a dot of candy coating. Drizzle candy coating on to coat front, avoiding eye(s). Sprinkle it with coconut. Drizzle to coat back. Sprinkle again. Drizzle to coat top. Sprinkle again. You gotta work in stages as the candy coat hardens real quick on the frozen bananas.
3- Frankenstein Kiwis

(Nutrition profile: Vegan, Lactose-Free)
INGREDIENTS
- 1 kiwi
- 2 pretzel sticks (and thicker "dipping sticks," if desired)
- 2 mini chocolate chips or dried wild blueberries
INSTRUCTIONS
- Slice one end off the kiwi, so the kiwi sits upright and flat.
- Beginning at the cut end of the kiwi, use a vegetable peeler to remove some of the kiwi's fuzzy skin. As you get toward the top third of the kiwi, pull the kiwi's skin away in little jagged bits so that the skin remaining at the top of the kiwi will look like messy Frankenstein hair.
- For the mouth: Break a pretzel stick into a small piece (roughly about 1/2" to 3/4" long), and gently push that piece lengthwise into your kiwi to make a mouth.
- For the bolts: Break another pretzel stick (or a thicker pretzel "dipping stick") so you have two end pieces that are each about 1/2" long. Shove those into your kiwi (broken end first), one low on each side of your kiwi, to form the bolts in your Frankenstein's neck.
- For the eyes: Use two chocolate chips or two dried wild blueberries for eyes, gently pushing each into position above the pretzel mouth.
4- Silly Apple Bites

(Nutrition profile: Vegan, Gluten-Free, Lactose-Free)
INGREDIENTS
- 2 green apples, each quartered
- sunflower butter
- 32 sunflower seeds
- 2–3 strawberries, sliced
- 1–2 homemade googly eyes per apple bite
INSTRUCTIONS
- Cut the middles out of each quarter of the apple to create a mouth. Don’t worry about perfection, you are filling this gap with sunbutter anyway so if you cut too deep, you can always just cover it up and no one will know.
- Coat the inside of the cut gap with a filling of sunflower butter.
- Place 4 sunflower seeds on the top of the “mouth” for the teeth.
- Place 1 sliced strawberry inside the mouth for the tongue.
- “Glue” each eye above the mouth with a dab of sunbutter to stick.
- Serve with a smile.
5- Vegan Pumpkin Cheesecake Parfait

(Nutrition profile: Vegan, Gluten-Free, Lactose-Free)
INGREDIENTS
- 1 cup raw cashews, soaked in 3 cups water for at least 1 hour
- 2/3 cup pumpkin puree
- 1/4 cup maple syrup
- 1/4 cup almond milk
- 1/2 teaspoon pumpkin spice
- Pinch sea salt
- 1/2 cup coconut yogurt
- 2 teaspoons activated charcoal powder (optional for black color)
- 1/2 a package of Simple Mills Crunchy Toasted Pecan Cookies
INSTRUCTIONS
- Add soaked cashews, pumpkin, syrup, milk, pumpkin spice, and salt into a blender. Blend on high until smooth and creamy. In a separate bowl, whisk together the yogurt and charcoal. Finally, add the cookies into a small plastic bag and crush into chunks.
- Assemble the parfaits with a layer of pumpkin cheesecake, yogurt, and cookies. Repeat until you've used all your ingredients!
6- Mini Pumpkin Vegan Cheesecake Jack-O-Lanterns

(Nutrition profile: Vegan, Gluten-Free, Lactose-Free)
INGREDIENTS
For the cheesecake:
- 1 1/2 Tbsp Flax meal
- 3 Tbsp + 2 tsp Warm water
- 1 1/4 Cups Roasted cashews* covered in water and soaked overnight
- 2/3 Cups Pumpkin puree
- 5 Tbsp Coconut sugar
- 2 1/2 Tbsp Unsweetened vanilla almond milk
- 2 1/2 Tbsp Maple syrup
- 1 Tbsp Coconut oil melted
- 1/2 Tbsp pumpkin pie spice
For the crust:
- 3 Tbsp coconut oil at room temperature (it should be the consistency of softened butter)
- 1 1/2 Tbsp Maple syrup
- 6 Tbsp Coconut flour sifted (31g)
- 1 Tbsp Unsweetened cocoa powder
- Pinch of salt
For The Face:
- 2 Oz Dark Chocolate dairy-free for a vegan option
- 1/4 tsp Coconut oil melted
- Mint sprigs for the stems
INSTRUCTIONS
- Preheat your oven to 350 degrees.
- In a small bowl, whisk together the flax meal and warm water and place it into the refrigerator to gel while you make the cheesecake.
- Place the soaked cashews into a high-powered blender (make sure you drained the water into the sink first!) along with all of the other ingredients for the cheesecake. Puree until thick, smooth and creamy, scraping down the sides as necessary. Set aside while you make the crust. Note: you want to be able to pour the cheesecake onto the crust as SOON as it's out of the oven, which is why it's best to prepare it first.
- In a large bowl, beat together the coconut oil and maple syrup for the crust, until smooth. Stir in the coconut flour, cocoa powder, and a pinch of salt until well mixed.
- Divide the dough by lightly heaping teaspoons between a 12-cavity mini-cheesecake pan, pressing out evenly.
- Bake until the crust just appear set, about 5 minutes
- When the crust has about 2 minutes left to bake, transfer the cashew mixture into a large bowl and pour in the flax eggs from the refrigerator. You want to leave them in the refrigerator as long as possible, so they can really gel up. Stir until the flax is evenly mixed into the cashew cream.
- Remove the crusts from the oven. Your crust will most likely have risen in a few spots. Just use a small spoon to pack it back down flat, making sure you don't leave any cracks.
- Immediately fill each cavity, just over 3/4 of the way full, with the pumpkin cashew mixture.
- Bake until the cheesecakes have slightly risen and the outside appears set and firm, but just a small circle in the center still appears slightly jiggly, about 11-12 minutes. Remove from the oven and let cool completely on the counter. Then, cover and refrigerate for at least 6 hours to overnight to completely set.
- Once set, place the chocolate and coconut oil in a small, microwave-safe bowl and melt in the microwave using 30-second intervals on half power, stirring between each interval, until smooth and melted.
- Drizzle the chocolate over each cheesecake to create a Jack-O-Lantern face (I put my melted chocolate in a small squeeze tube to make it easier.)
- Stick a mint sprig at the top of each pumpkin to create the stem.
7- Chocolate Covered Strawberry Ghosts

(Nutrition profile: Vegan, Gluten-Free, Lactose-Free)
INGREDIENTS
- 1 pint of fresh strawberries
- 6 oz. white chocolate melting wafers
- a small tube of black icing
INSTRUCTIONS
- Line a baking sheet with parchment paper. Set aside.
- Place white chocolate wafers in a small bowl.
- Put in the microwave in 30-second increments until chocolate is melted and smooth.
- Dunk strawberries in the chocolate and place on the prepared baking sheet.
- Continue the process until all strawberries are covered.
- Place in the refrigerator for 5 minutes to let the chocolate harden and cool.
- Remove from the oven. Using a small tube of black icing, make two eyes and a mouth with the icing.
8- Paleo And Vegan Witch Finger Cookies
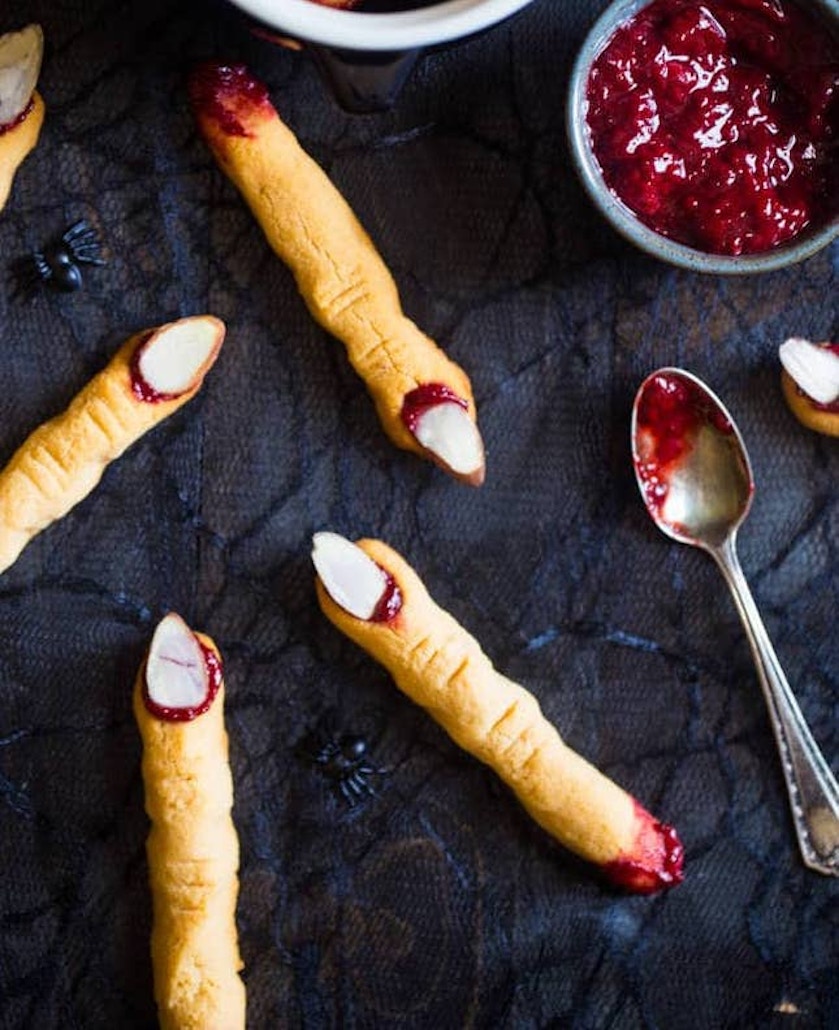
(Nutrition profile: Paleo, Vegan, Gluten-Free, Lactose-Free)
INGREDIENTS:
For the cookies:
- 1/4 cup + 3 Tbsp Honey
- 1/2 Cup Coconut oil at room temperature (should be the consistency of softened butter)
- 1 tsp Vanilla extract
- 1/2 tsp Almond extract
- 1 cup Coconut flour sifted (88g)
- 1/4 tsp salt
- 16 sliced almonds
For the strawberry jelly:
- 3/4 Cup frozen strawberries thawed and roughly chopped (170g - measured when fully thawed and soft)
- 2 Tbsp Honey
INSTRUCTIONS
- In a large bowl, using an electric hand mixer beat together the honey and coconut oil and smooth and creamy. Add in the vanilla and almonds extracts and beat once more.
- Add the coconut flour and salt into the bowl and stir until well combined, and a wet dough forms. Scrape the dough onto a large piece of saran wrap and wrap it into a flat, thin disc. Place into the refrigerator until firm and roll-able, about 25-30 minutes.
- While the dough chills, preheat your oven to 325 degrees and line a baking sheet with parchment paper. Set aside.
- In a small saucepan, combine the chopped berries and honey and bring to a boil over medium heat. Cook the berries, stirring frequently, until they become very thick and smooth, about 13-14 minutes. Make sure to really keep an eye at them near the end of cooking time, so they don't burn.
- Transfer the berry mixture to a bowl and mash with a fork. Place into the refrigerator to set up.
- Remove the dough from the refrigerator and roll 1 Tbsp sized balls into 4 inch long finger-shapes, that are about 1/2 an inch thick. Place onto the prepared baking sheet and firmly press a sliced almond into the tip of the finger, to create fingernails. Remove the almond before baking. Then, using a small, sharp knife, make several horizontal, shallow cuts just under the fingernail, and then in the center of each finger, to represent knuckles. Lightly press in the dough on either side of the knuckles to shape them. Place the whole pan into the freezer for 10 minutes.
- Once frozen, bake the cookies until golden brown, and lightly crackly (the cracks are normal, don't worry!) about 12-13 minutes. Let cool on the pan COMPLETELY.
- Once cooled, dip the bottom of the finger into the strawberry jam, so it looks like it's been cut off. Then, fill the fingernail space with a dollop of the jam, and press in a sliced almond.